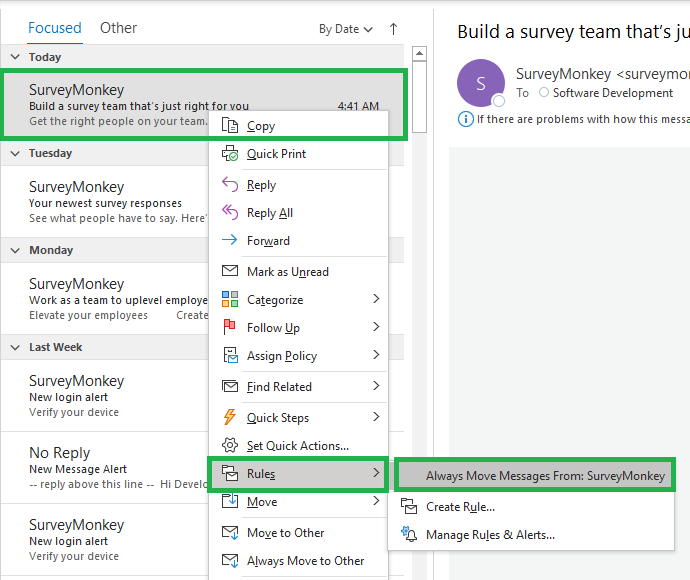
1.- First choose the email you want to move, then rigth click the mouse to expand the options menu, select 'Rules' option and then select 'Always Move Messages From: ...'
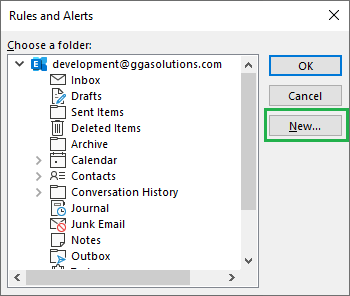
2.- A new window will prompt to choose the destination forlder for the email, you can use an existing folder or create a new one, click the 'New' button.
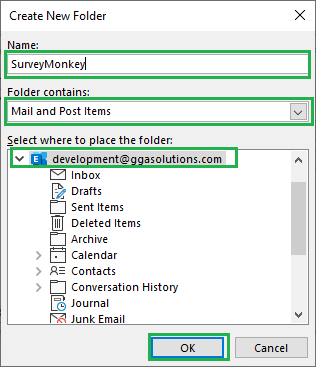
3.- Provide a name for the folder, the Folder Contains leave it as it is, if you have more than one email account on outlook make sure to have the one you want to use selected and expanded, last click the 'OK' button.
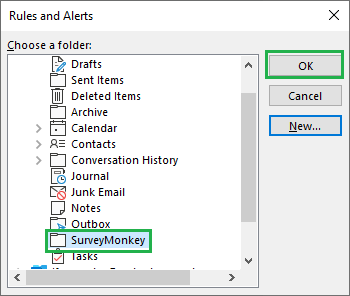
4.- Now that the new folder is created it will show up under the selected email account, select the Folder and then click the 'OK' button.
5.- A new pop up will show running the rule on the selected email and moving it to the created folder.

6.- In order to move current messages that were not selected yet, choose the email then rigth click the mouse to expand the options menu, select 'Move' option and then select 'Always Move Messages in This Conversation' option.
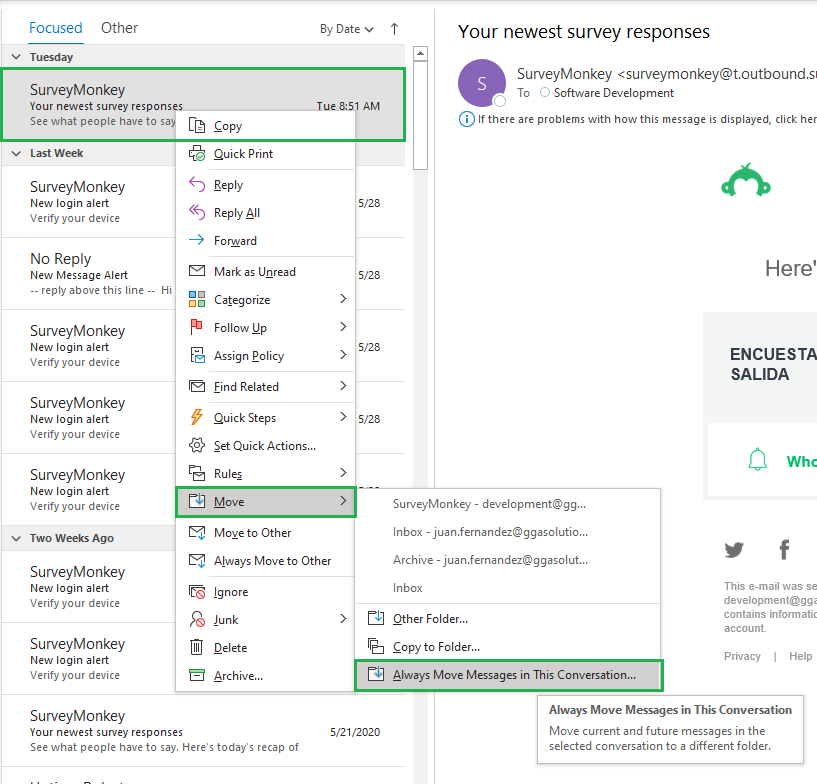
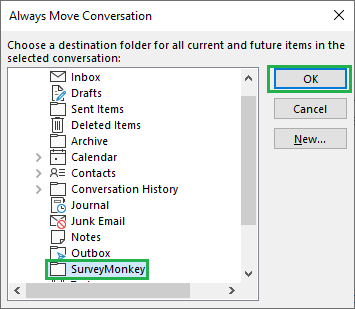
7.- In the next window select the same created folder and then hit 'OK' button, after that all messages will start moving to the folder and every new email comming from that sender will be moved as well.
1.- First choose the email you want to create a follow up, hover on the area shown on the green rectagle and locate the flag icon.

2.- Click on the located flag, the flag will turn to red and a follow up message will be shown under the email header.

3.- If we click again on the red flag icon, the follow up will be marked as completed, it will also update the follow up messsage under the email header.

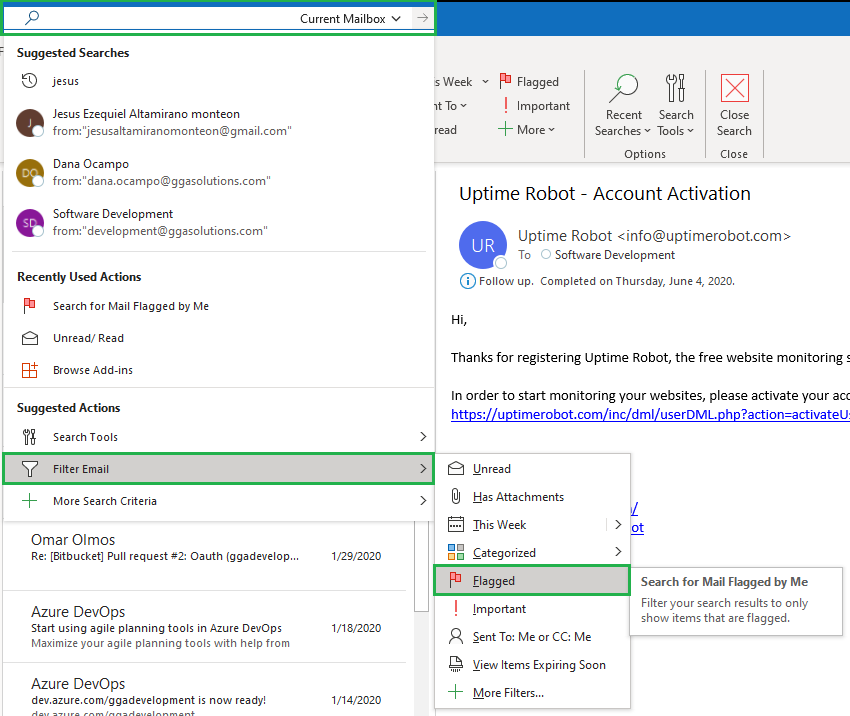
4.- If you want to know what emails you have for follow up go to the upper search bar and expand the options, select 'Filter Email' then select the 'Flagged' option.
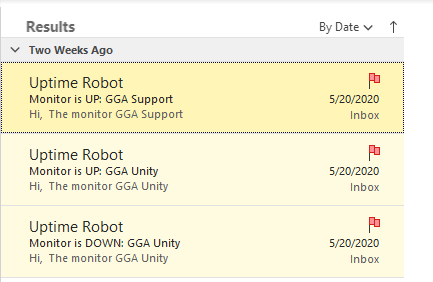
5.- After filtering you will only see all emails with follow up flag.
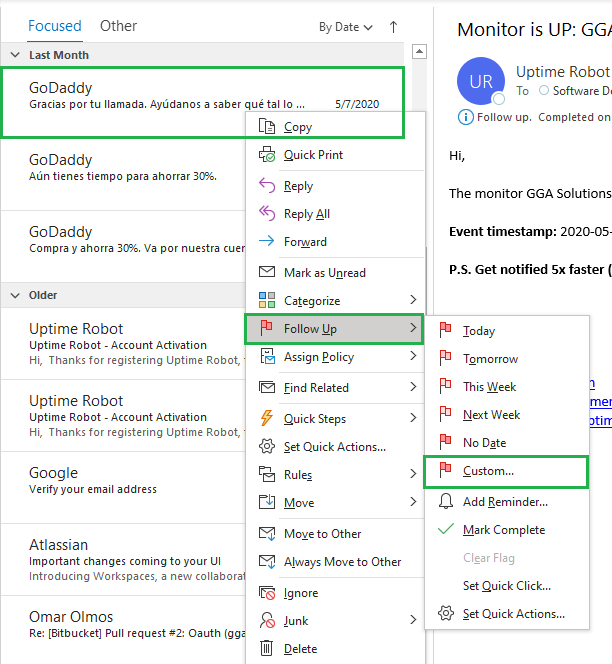
1.- First choose the email you want to mark for follow up, then rigth click the mouse to expand the options menu, select 'Follow Up' option and then you can select any of the flag options, for this example select "Custom", this option will let you choose a more specific follow up date and time.
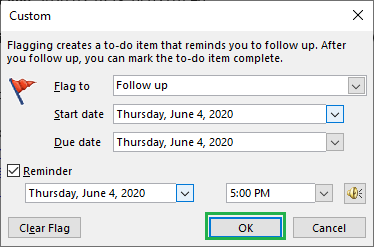
2.- On the next pop up you can choose flat to as follow up, then the between dates, and if you like set a reminder, last click on 'OK' button.
3.- If you look at the follow up message under the email header you will notice that all info regarding the custom follow up is detailed.

4.- If you setted a reminder, then a notification will pop up right on the time specified.
